In this tutorial, we will focus on Maritx CNC Integration with CNC gateway. We hope this proves helpful.
Nas aulas anteriores, abordámos:
Como o EG8200 Mini CNC Gateway se liga aos sistemas CNC da Siemens
Como integrar o CNC Gateway com o CNC da Mitsubishi
Como integrar o CNC Gateway com a nova geração de CNC
How to Integrate the CNC Gateway with HAAS CNC
This lesson will provide a detailed explanation for Maritx CNC systems.
1. Ligação do hardware
Maritx CNC utilizes Ethernet communication. Ensure the LAN port IP of the gateway and the Maritx CNC IP are within the same subnet (Note: In special cases, routing configuration may be required if they are not on the same subnet; consult technical support for details). IP addresses are assigned as follows in this example:
|
EG8200 Mini-CNC gateway |
Maritx CNC (Ethernet) |
|
| Endereço IP |
192.168.0.88 |
192.168.0.11 |
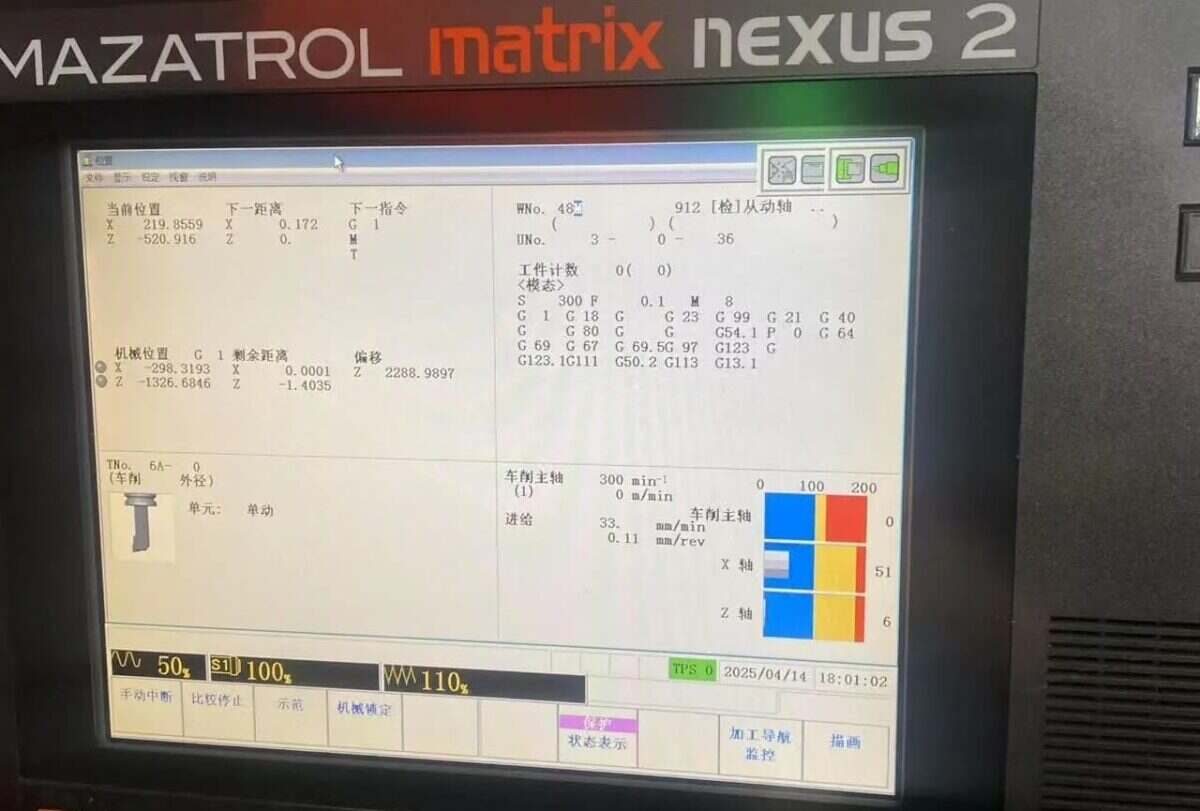
2. Machine Tool Configuration
To establish communication with Matrix, you need the FusionClient.exe plugin. This plugin actively pushes machine tool data to the configured target IP address.
Locate C:\CPCU\fmcnc on the machine tool system desktop. This path should contain FusionClient.exe and its required components.
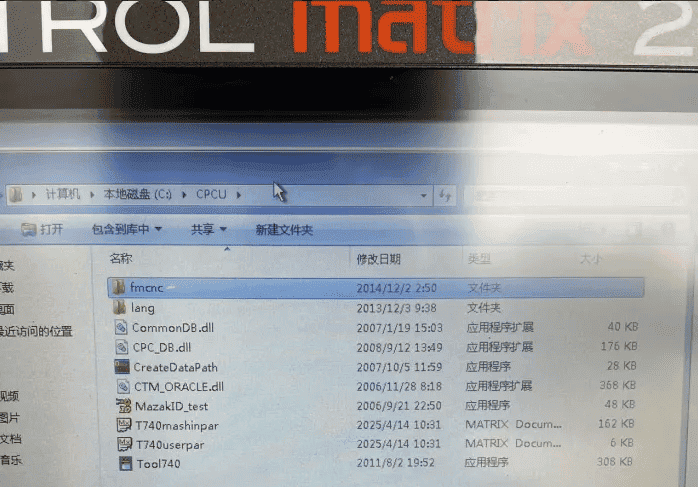
If the fmcnc file is not present in the machine tool’s C:\CPCU directory, download FMCNC.zip.
Copy the file directly using a USB drive. The machine tool’s USB port may be located in the metal box beneath the keyboard.
If the USB port cannot be found, copy the file via network sharing (File Sharing Tutorial).
Open the startup path and verify if FusionClient.exe is present in the list of programs set to run at startup. If absent, add a shortcut to FusionClient.exe from the C:\CPCU\fmcnc directory and copy it to the following startup path (note: paths vary by operating system):
Autostart paths for different systems:
Windows 95: C:\Windows\Startmenu\Program\Startup
Windows 2000: C:\Documents and Settings\All Users\StartMenu\Programs\Startup
Windows XP: C:\Documents and Settings\All Users\StartMenu\Programs\Startup
Windows 7: C:\Users\Administrator\AppData\Roaming\Microsoft\Windows\Start Menu\Programs\Startup
After running FusionClient.exe, move your mouse to the bottom-right corner of the desktop to reveal the taskbar, then double-click the icon.

Open the program’s settings interface
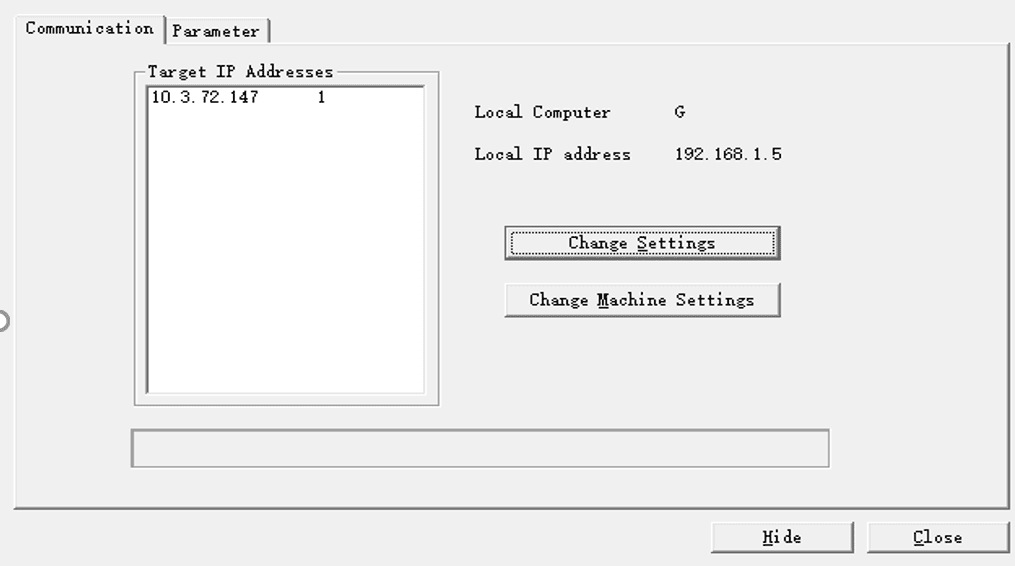
Click ‘Change Settings’
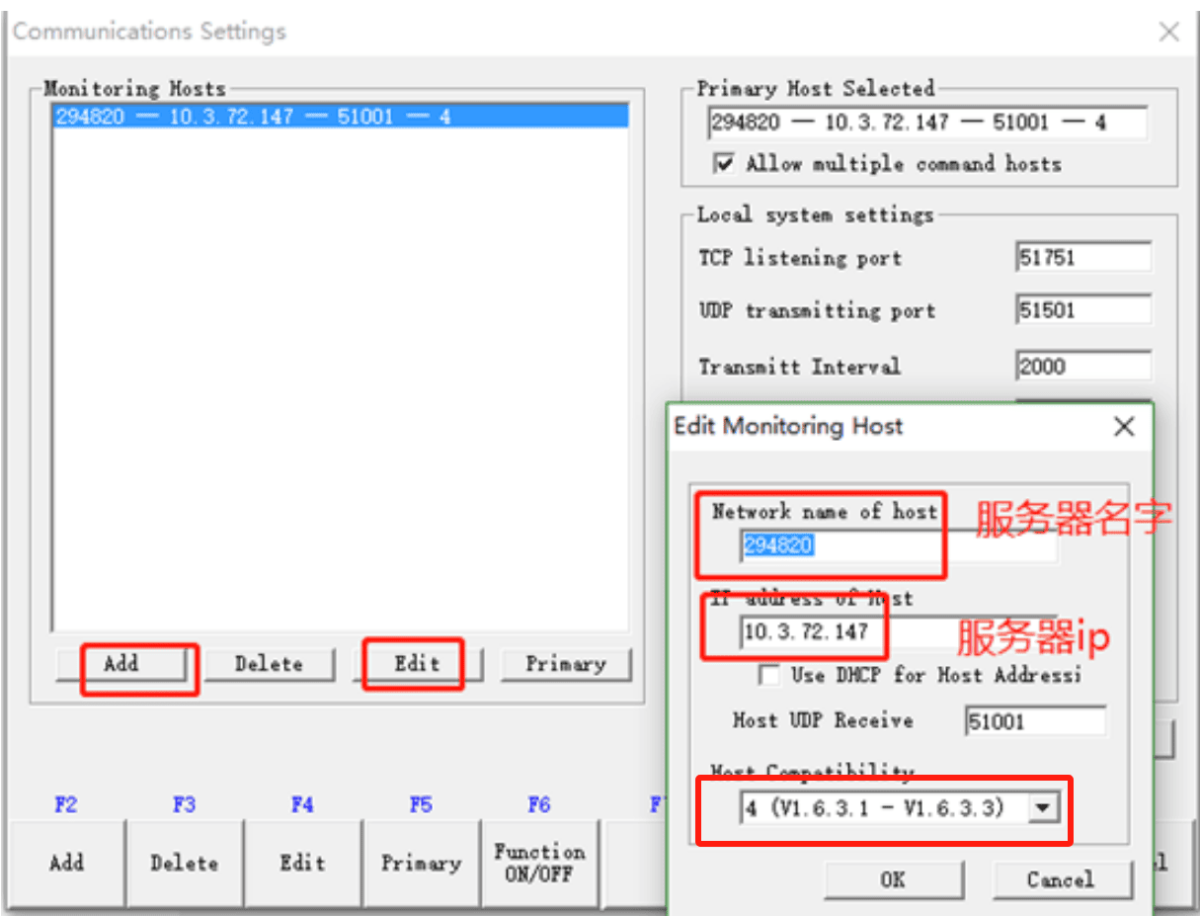
First, click Add to create a new data push. In the pop-up window, enter a server name (any name), then input the server IP (gateway IP address). Click OK, then click Hide below to minimize the software. Click Close to shut down the software. Settings can be modified later via Edit. Note that 51001 is the server’s data reception port.
3. Configuração da porta de entrada
3.1. Configurações de ligação do CNC
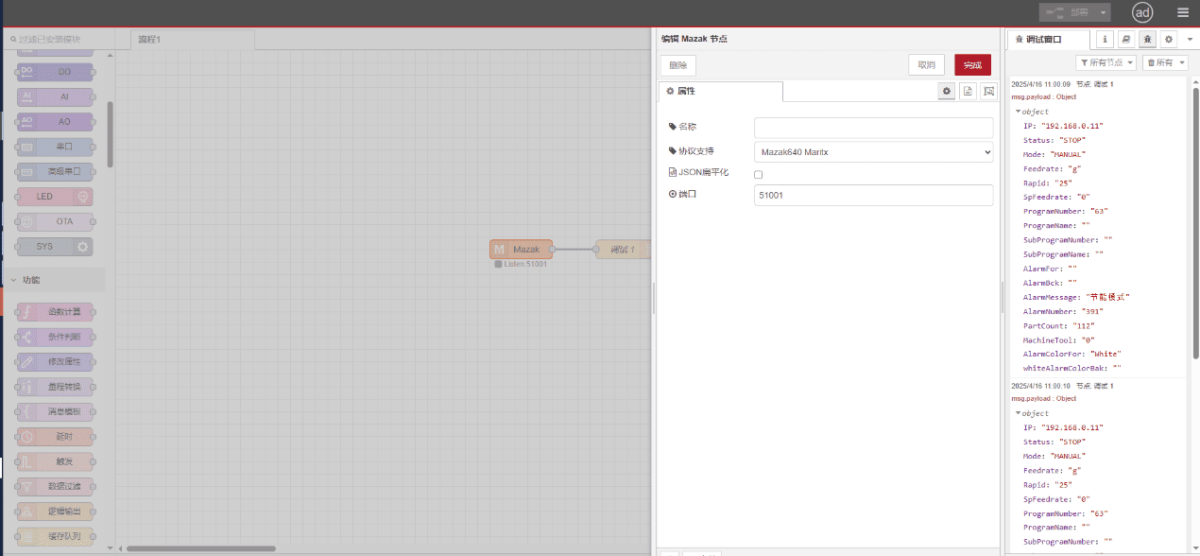
Drag a Mazak node from the CNC panel on the left. Double-click to open the settings page and configure as follows based on your PLC parameters:
Protocolo: Mazak640 Maritx
Porto: 51001
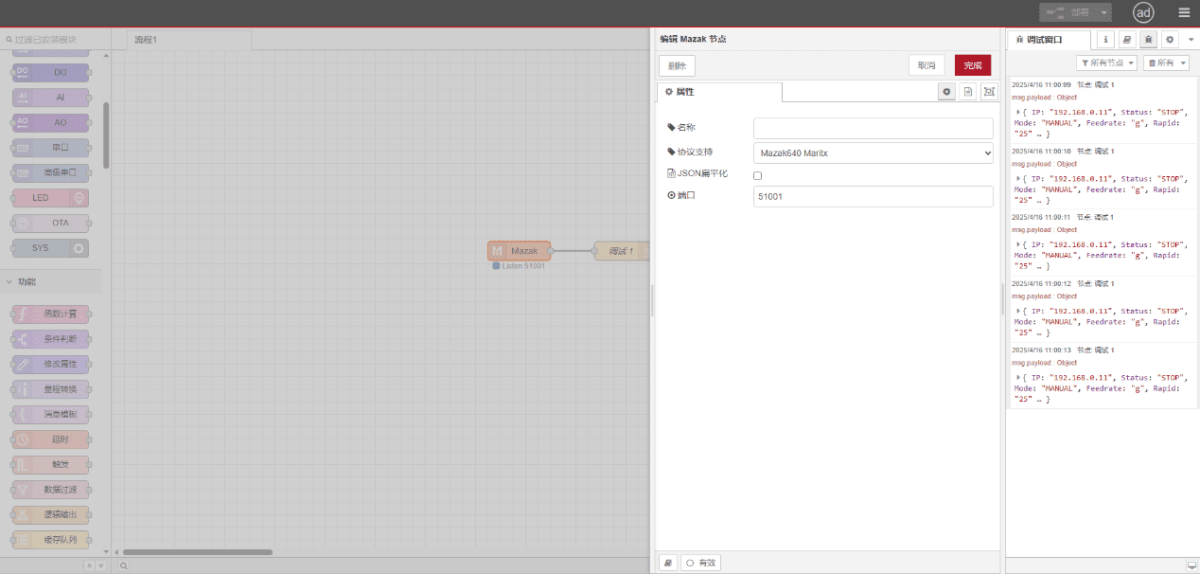
3.2. Testes
Clique em «Implementar» e observe que é apresentado um ponto de dados a cada poucos segundos. Verifique os pontos de dados recebidos para confirmar que a comunicação foi bem-sucedida!
Para consultar a tabela de referência dos pontos de dados, consulte:
Esta é uma ficha de conteúdo sobre os Yueque. Clique na ligação para ver: https://iotrouter.yuque.com/zn3vdn/eg8000/op34medz6uezbqf7

Agnes Wang é especialista em soluções de IoT na IOTRouter, dedicando-se principalmente a gateways de IoT industrial, computação de ponta e soluções de automação industrial.
É especialista em tecnologias de comunicação industrial, incluindo Modbus, IEC 60870-5-104, MQTT, OPC UA, integração de PLC e aplicações de monitorização remota. Colabora na elaboração de artigos técnicos e guias de aplicação sobre soluções de IoT industrial, conversão de protocolos e computação na periferia.