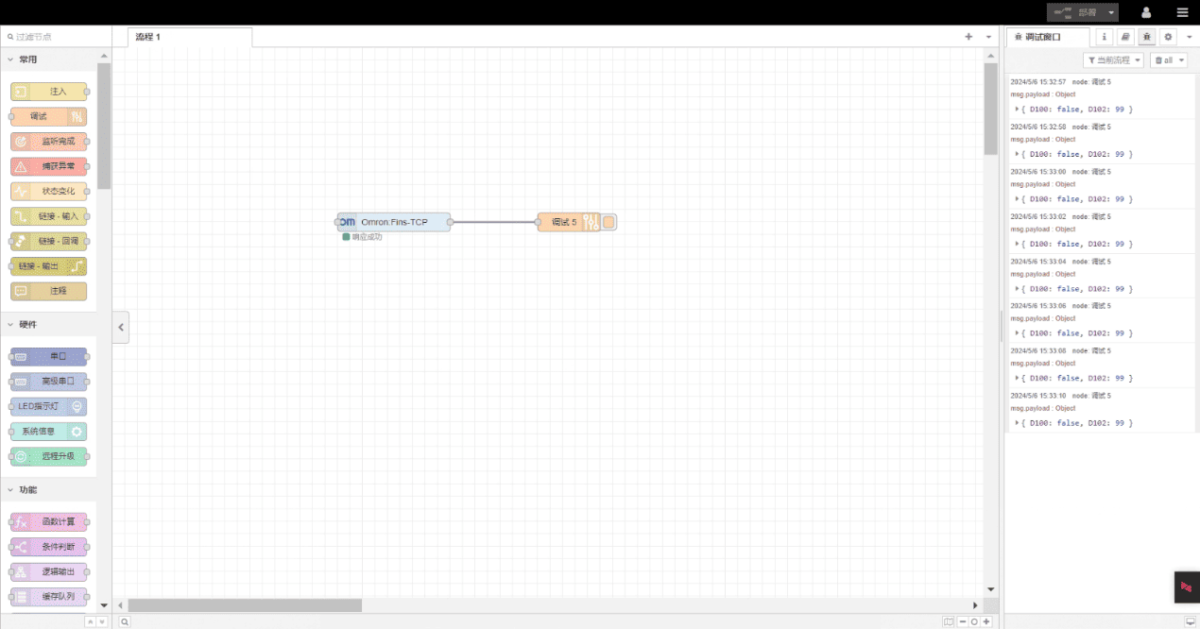
Today, let’s talk about how to interface with Omron PLC via Fins protocol.
El artículo del que hablamos antes:
How to interface with Omron PLC via EtherNet/IP protocol
How to interface with Omron PLC via Hostlink protocol
1. Conexión de hardware
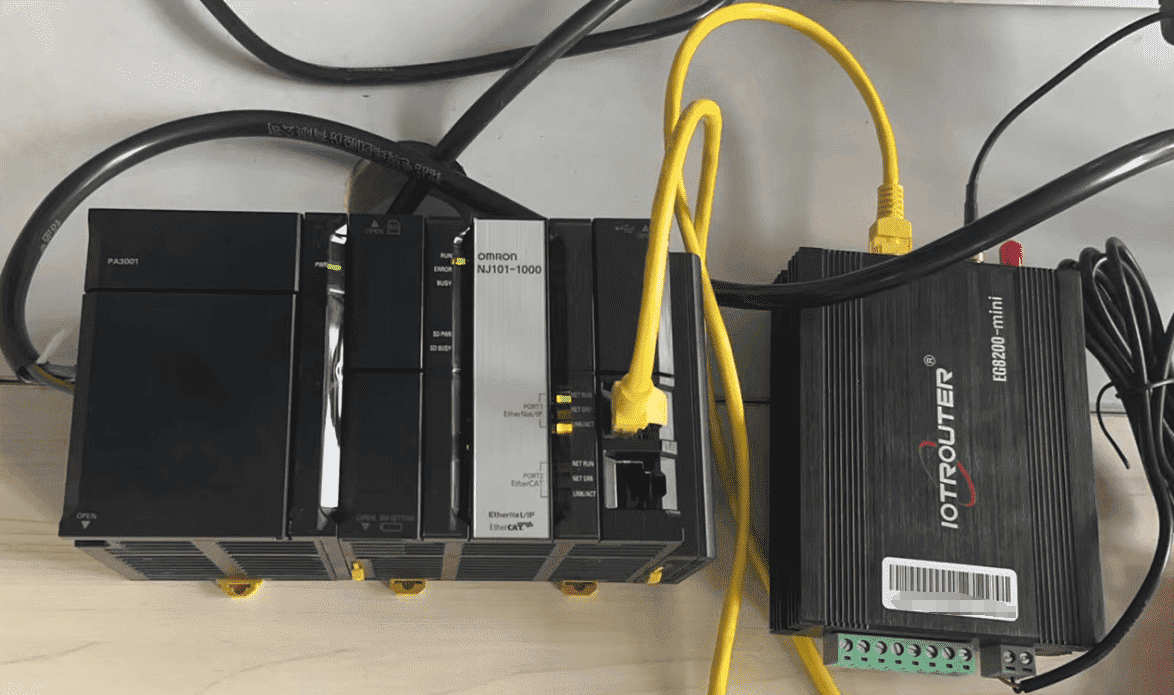
Compatible PLC: NJ101-1000
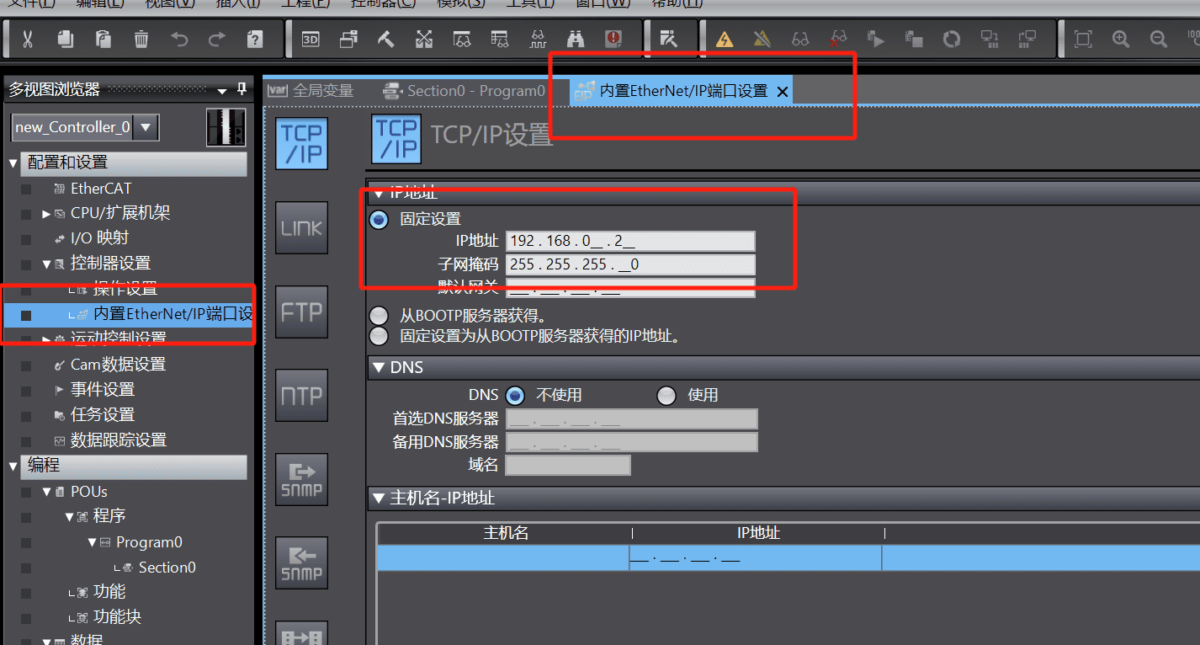
The FINS protocol uses Ethernet communication, so it is only necessary to ensure that the gateway’s LAN IP and the Omron PLC’s IP are on the same subnet (Note: in special cases, they do not need to be on the same subnet, but routing must be configured. For details, consult technical support). The IP addresses in this example are assigned as follows:
| EG8200Mini | Omron PLC | |
| Dirección IP | 192.168.0.80 | 192.168.0.2 |
2. Parámetros de comunicación PLC
2.1. Ethernet Parameter Settings
2.2. Variable Addresses

3. Configuración de la puerta de enlace
3.1. Configuración de la conexión del PLC
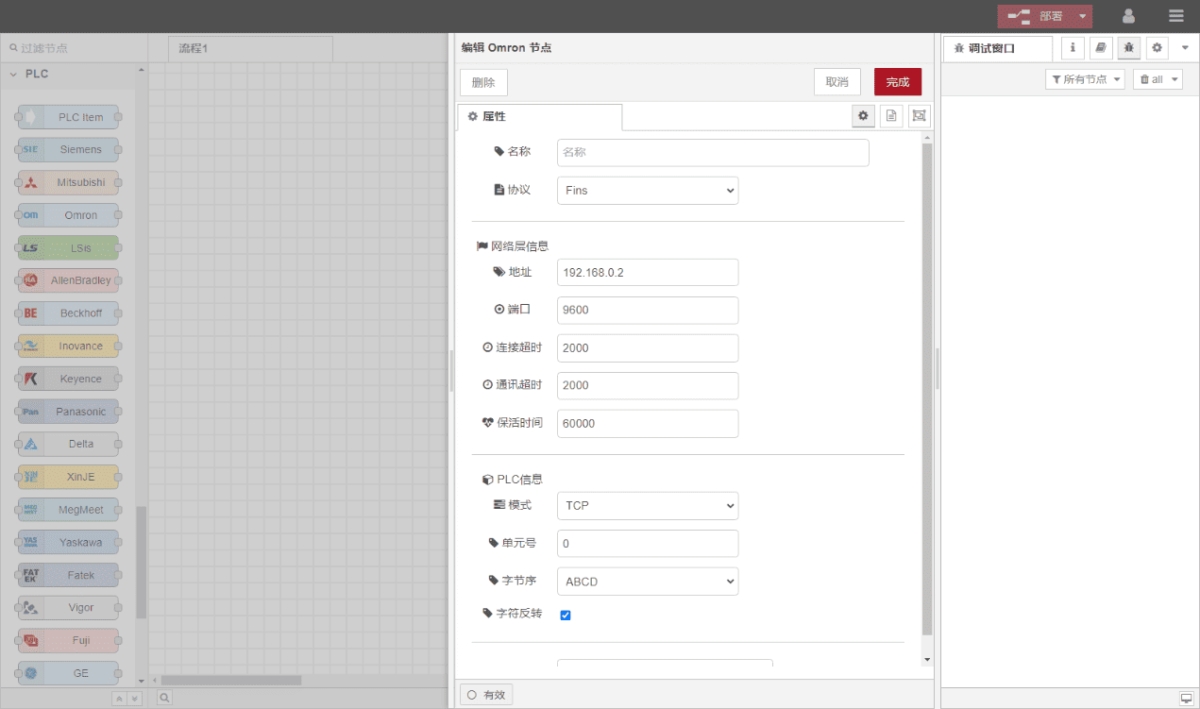
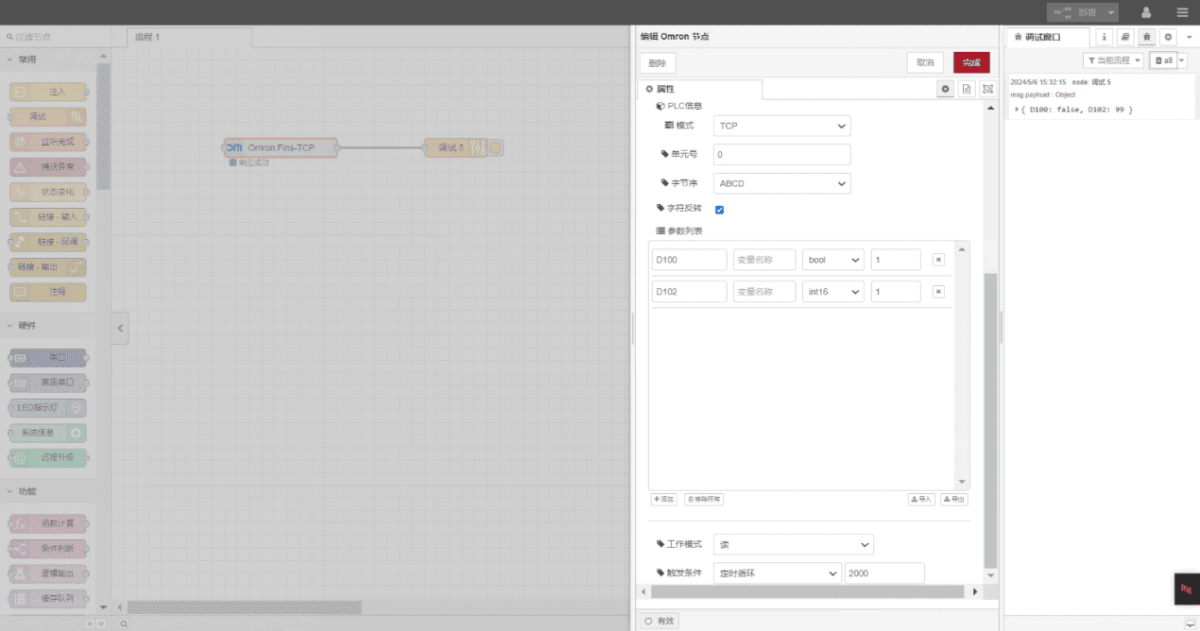
Drag an Omron node from the left panel and double-click to open the settings page. Configure it according to the PLC’s communication parameters as follows:
Protocolo: Select FINS
Dirección: Enter the PLC address, in this example: 192.168.0.2
Puerto: Enter the PLC connection port, in this example: 9600
Tiempo de espera de la conexión: 2000
Tiempo de espera de comunicación: 2000
Mode: TCP
Unit Number: 0
Byte Order: ABCD
3.2. Configuración de los puntos de datos
In the parameter list of the Omron node, enter the data points you want to read. Once the data points are configured, the gateway will automatically read the PLC data at the set frequency.
Data points are usually provided by the PLC engineer. After receiving the point table, fill in the data points according to the format required by the gateway. For specific mappings, refer to:
Yuque content card:(Puedes utilizar Google Chrome para la traducción) https://iotrouter.yuque.com/zn3vdn/eg8000/skfapgdm7332it5q
In this example, data from addresses D100 and D102 are read. In the parameter list, fill in the Address / Name / Data Type / Data Length, and set the reading cycle to 2 seconds, as shown below:
3.3. Pruebas
Haga clic en Despliegue and observe that a data entry is printed every 2 seconds. The read data points should appear as: D100: false, D102: 99. Communication is successful!
