Today, let’s talk about how to interface with Mitsubishi PLC using the MC-1E protocol.
The article we discussed before:
How to interface with Omron PLC via EtherNet/IP protocol
How to interface with Omron PLC via Hostlink protocol
How to interface with Omron PLC via Fins protocol
1. Подключение оборудования
Compatible PLC: FX-3U Series
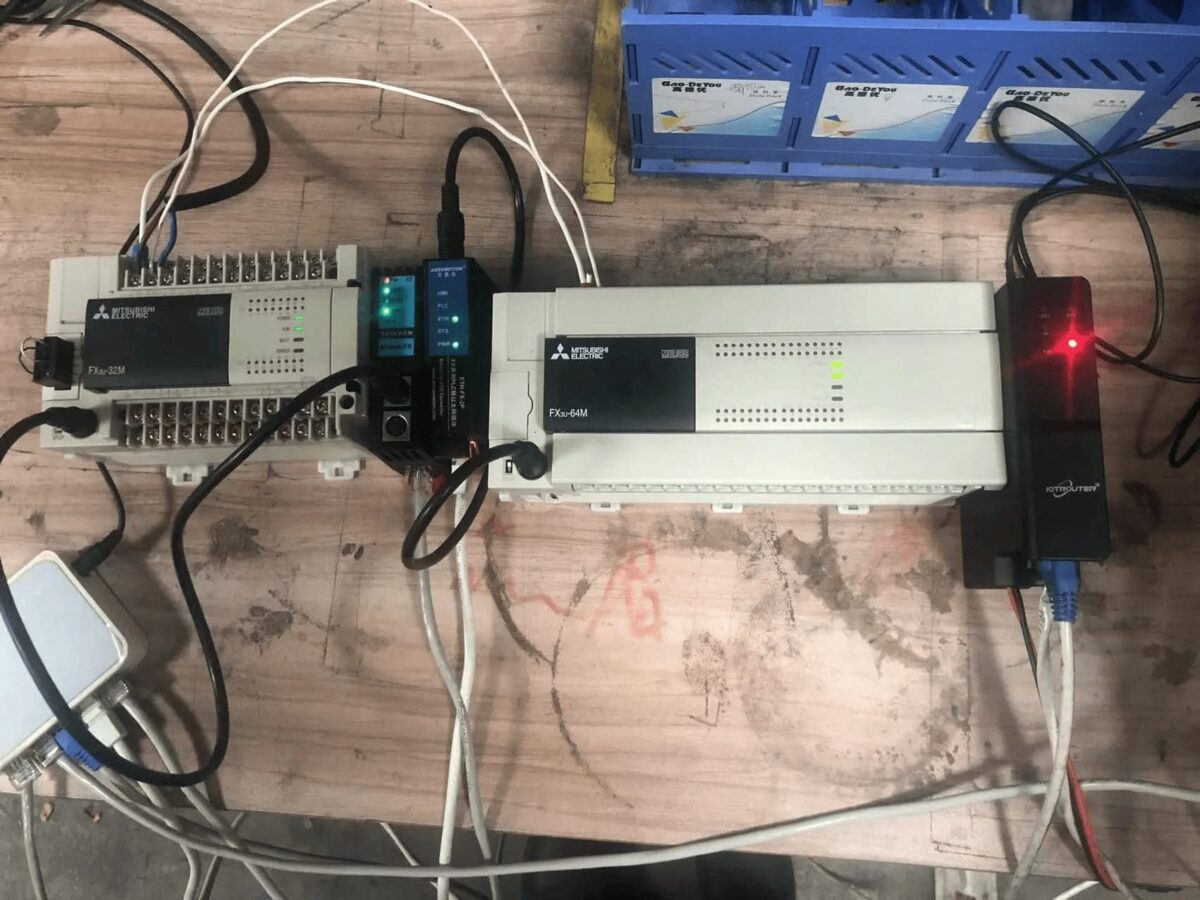
The MC-1E protocol uses Ethernet communication, so it is only necessary to ensure that the gateway’s LAN port and the Mitsubishi PLC’s IP are on the same subnet.

2. Параметры связи с ПЛК
2.1 Ethernet Parameter Settings
Предоставляется инженером ПЛК.
3. Gateway Settings
3.1 PLC Connection Settings
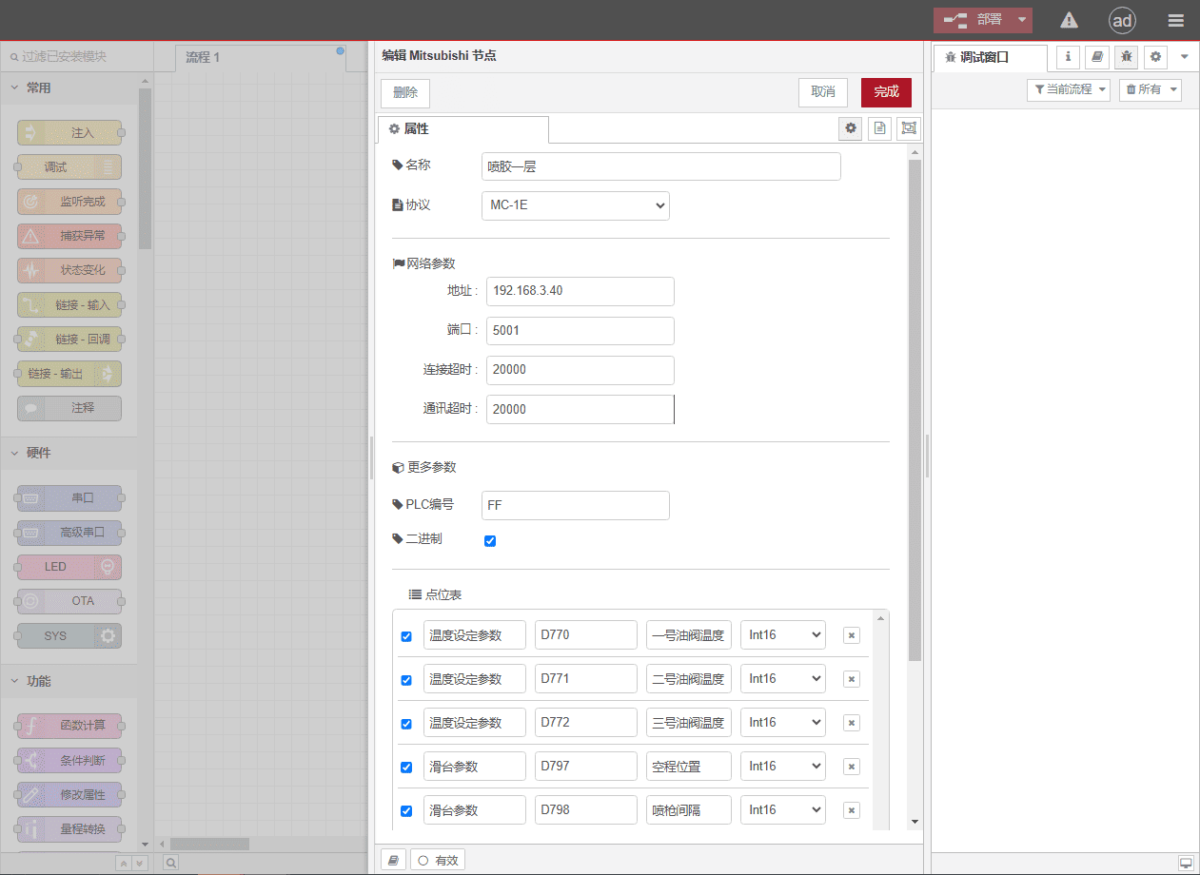
Drag a Mitsubishi node from the left panel and double-click to open the settings page. Fill in the configuration according to the PLC’s parameters as follows:
Протокол: Select MC-1E
Адрес: Enter the PLC address, in this example 192.168.3.40
Порт: Enter the PLC connection port, in this example 5001
Таймаут соединения: 2000
Таймаут связи: 2000

3.2 Data Point Settings
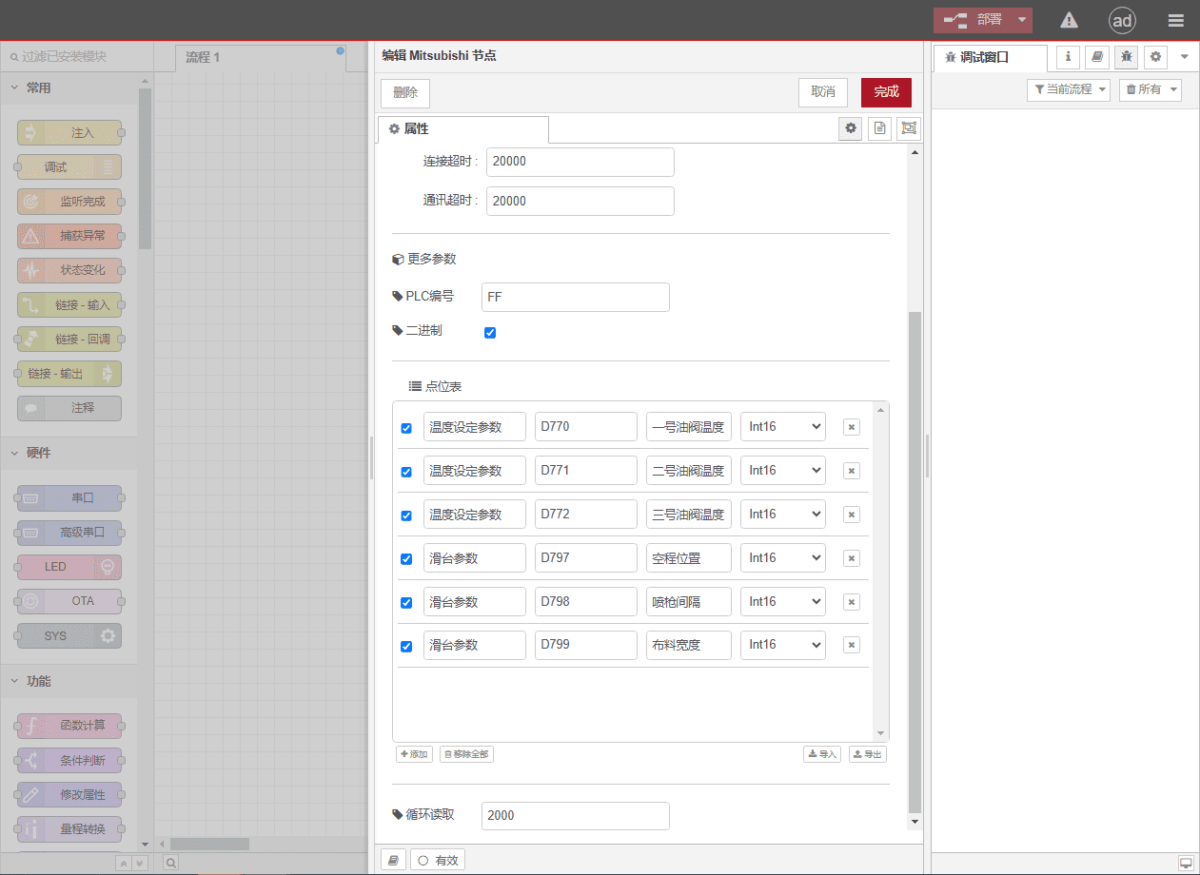
Fill in the data points to be read in the parameter list of the Mitsubishi node. Once the data points are entered, the gateway will automatically read the PLC data at the set frequency.
The data points are generally provided by the PLC engineer. After receiving the point table, fill in the data points according to the gateway’s required format. For specific correspondences, refer to:(You can use Google Chrome for translation)
https://iotrouter.yuque.com/zn3vdn/eg8000/gtyg0mdl9dipbu7u
In this example, data at D-type addresses is read. In the parameter list, fill in the Address / Name / Data Type / Data Length sequentially. The reading is performed in a 2-second loop, as shown in the figure.

3.3 Testing
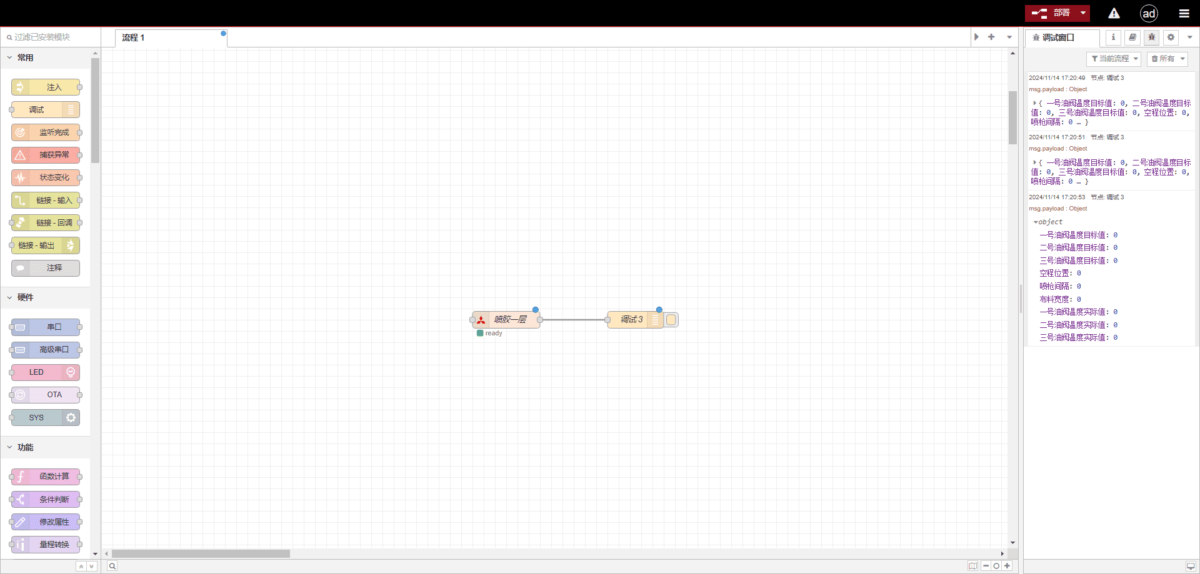
Нажмите Развернуть, and observe that a data entry is printed every 2 seconds. Check that the read data matches the actual values. Communication is successful!
